We are going to use Eclipse as IDE , facebook-java-api as java api of facebook and so java ( servlet ) as language.
First Things First
- Download Facebook Java Api : http://code.google.com/p/facebook-java-api/downloads/list
- Download Eclipse if you don't already have one.
- Download Tomcat
- Register an application on facebook.
Following Steps
- Create a dynamic web project
- Add jars (api)
- Configure project
- Code
- Configure Facebook
Let's Begin
Download Facebook Java Api from here. I used facebook-java-api-3.0.2-bin.zip Extract it wherever you want.
Download Eclipse from here . Use the latest one.. (Eclipse IDE for Java EE Developers should be your choice)
Download Tomcat from here. Also use the latest one..
Register an application on facebook http://www.facebook.com/developers/
Create a new application
Probably the label of the button appears different as "Create a new application" but I'm not sure :)
Agree The Terms and Conditions
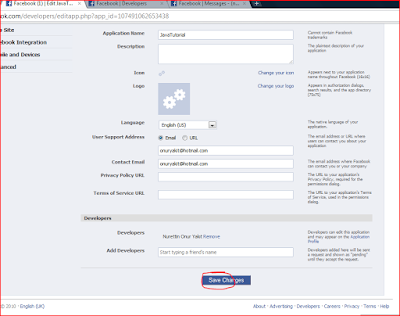
Enter the captcha ... Just Save The Changes.. On the following page..
Just Save the Changes
You have an registered application now...
Api Key
We are going to use the Api Key and Application Secret for the given Application ID.
In The Beginning There Was Creation..
So, open up your Eclipse. Enter to your workspace and create a dynamic web project for me.
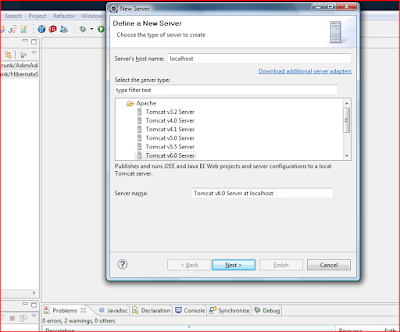
Name your project.. Select an Tomcat Server to run on it.. If there are no tomcat servers in use , create a new one..
The second red circle should be on finish :)
Browser for the tomcat that you just downloaded..
And finish..
Now you have a project like this ;
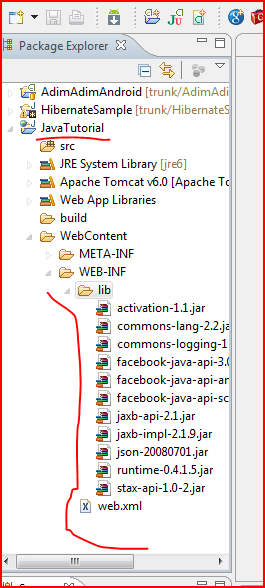
Now we are going to add the jars of the facebook-java-api. Go to the location where you just extracted the facebook-java-api-3.0.2-bin.zip the version may de different then mine. Just copy the jars inside the "lib" folder and paste them into the "lib" folder of our project in Eclipse.
So you have this then ;
Let's Code !
Create an Servlet ;
Now initialize the parameters ; API_KEY , SECRET_KEY
Do this again for the SECRET_KEY..
Hands On !
Create a private method and call it from doGet() and doPost()
private void process(HttpServletRequest request, HttpServletResponse response) throws ServletException, IOException {
String apiKey = getServletConfig().getInitParameter("API_KEY");
String secretKey = getServletConfig().getInitParameter("SECRET_KEY");
HttpSession session = request.getSession();
String sessionKey = (String) session.getAttribute("appServlSession");
String authToken = request.getParameter("auth_token");
FacebookJsonRestClient client = null;
if(sessionKey!=null){
client = new FacebookJsonRestClient(apiKey,secretKey,sessionKey);
}else if(authToken!=null){
client = new FacebookJsonRestClient(apiKey,secretKey);
try {
sessionKey = client.auth_getSession(authToken);
session.setAttribute("appServlSession", sessionKey);
} catch (Exception e) {
e.printStackTrace();
}
}else{
response.sendRedirect("http://www.facebook.com/login.php?api_key="+apiKey);
return;
}
response.getWriter().println("Hello World" );
}
You see the code ; if the user given permission before the code is running else directing to facebook site asking for permission..
But wait how the facebook knows our application ? So this question takes you to the Configuration part!
The Configuration
Facebook part
Go to your application page. On http://www.facebook.com/developers/
Click on your application then Navigate to the Facebook Integration part and Give the url's ;
The port number probably 8080 at your server
There is a trick here !!!
Look carefully! there is a "/" at our Canvas URL. But when you start your servlet the "/" don't appears on your (right click to the servlet and run on server) local host url.. This is the tricky part...
Open your web.xml file and add "/" to your servlet url like this ;
If you don't then you get "canvas url is not valid" like the discussion here or you can't access your application..
RUN
Run your application inside ide ; (right click to the servlet and run on server) you see the application redirects you to the facebook for permission.. And then ;
You may see your application in your profile.. Also you may use this application as a staring point..
Thanks for comments.


1 comment:
Super anlatim, super paylaşim
Post a Comment